Table of Contents
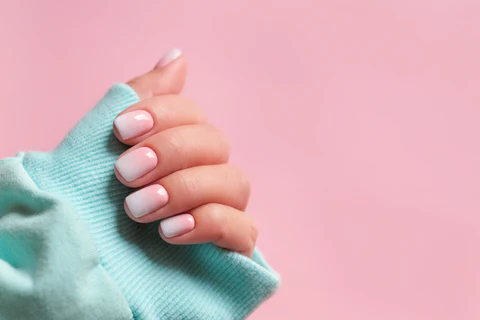
Builder In A Bottle (BIAB) has revolutionized nail care with its durable, flexible structure that strengthens and enhances natural nails. However, when it’s time for removal, improper techniques can lead to brittle, damaged nail beds. This guide explains how to remove BIAB at home safely and professionally—saving both time and money without compromising your nail health.
Understanding BIAB Nail Enhancements
BIAB, or Builder In A Bottle, is a soak-off gel-based nail enhancement system widely used in salons. It offers superior strength compared to regular gel polish and is ideal for creating a natural-looking nail overlay or minor extensions. Unlike hard gel or acrylic, BIAB is designed to be removable with acetone, making at-home removal feasible with the correct method.
Preparing for Safe BIAB Removal
Before you begin, ensure your workspace is clean, well-ventilated, and equipped with the necessary materials. BIAB removal can take 20–40 minutes, depending on product thickness and application quality. Rushing this process increases the risk of nail plate trauma, so set aside enough uninterrupted time.
Safety Precautions:
- Avoid picking or peeling the BIAB layer.
- Work gently to protect the keratin layer of the nail.
- Do not use metal tools aggressively.
- If you feel burning or pain, pause and reassess your technique.
Tools and Materials Needed
To effectively remove BIAB at home, gather the following tools:
- 100/180 grit nail file or electric nail drill (optional but helpful)
- Pure acetone (100%)
- Cotton pads or cotton balls
- Aluminum foil or reusable nail clips
- Orangewood stick or cuticle pusher
- Cuticle oil or nourishing nail serum
- Buffer block
- Hand cream or barrier cream (optional)
Step-by-Step Home Removal Process
1. File the Top Layer:
Using a coarse nail file or electric file, gently remove the top shiny coat of the BIAB. This allows the acetone to penetrate more efficiently. Take care not to file down to your natural nail.
2. Prepare Soak-Off Wraps:
Soak cotton pads in pure acetone and place them on each nail. Wrap tightly with aluminum foil or secure using nail clips. This step allows the acetone to break down the BIAB formulation.
3. Wait and Soften:
Leave the wraps on for 15–20 minutes. You may feel slight warmth—this is normal. If the product doesn’t lift easily after 20 minutes, rewrap and soak for an additional 5–10 minutes.
4. Gently Remove the BIAB:
Unwrap one nail at a time and use an orangewood stick or cuticle pusher to gently nudge the softened product off the nail plate. Avoid scraping with force. If resistance occurs, rewrap and soak again.
5. Lightly Buff the Surface:
After removing most of the BIAB, use a buffer block to smooth the nail surface. This helps remove residue and restores an even texture.
6. Hydrate and Protect:
Apply cuticle oil generously and massage into the nail and surrounding skin. Follow up with a rich hand cream to restore moisture lost during the acetone soak.
Aftercare for Your Natural Nails
Post-removal care is crucial in maintaining healthy nails. BIAB strengthens natural nails, but removal can still leave them temporarily fragile. Implement the following aftercare tips:
- Use nail-strengthening treatments containing biotin, calcium, or keratin.
- Avoid reapplication of gels or enhancements for at least one week to allow nail recovery.
- Maintain hydration with daily cuticle oil use.
- Limit water exposure immediately after removal, as nails may be porous and vulnerable.
Common Mistakes to Avoid
1. Peeling or Picking Off BIAB:
This can cause serious damage to the nail bed and lead to painful peeling.
2. Using Metal Tools Aggressively:
While effective for pushing product, excessive pressure can thin the nail plate.
3. Insufficient Soaking Time:
Rushing the soak-off process may force you to scrape or file excessively, weakening the nail.
4. Skipping Aftercare:
Neglecting moisture restoration post-removal can result in brittle, peeling nails.
Removing BIAB at home is entirely achievable with the right tools, knowledge, and a gentle, patient approach. Whether you’re transitioning to a new nail style or giving your nails a break, learning how to remove BIAB at home empowers you to care for your nails independently—without sacrificing safety or professionalism.
Conclusion
Learning how to remove BIAB at home offers a practical and cost-effective solution for those looking to maintain their nails without frequent salon visits. With the correct tools, careful technique, and a focus on nail health, you can safely dissolve and remove BIAB without causing damage. Remember, patience is essential—rushing the process can compromise the integrity of your natural nails. By following the step-by-step guide and prioritizing aftercare, you can ensure your nails stay strong, healthy, and ready for your next manicure.