Table of Contents
In the ever-evolving world of home fragrance, finding a method that is both powerfully aromatic and inherently safe can be a challenge. While candles have long been the traditional favorite, a versatile and potent alternative has risen to prominence: the wax melt. These small, scented cubes offer a flameless way to infuse your space with captivating aromas, but many are unsure of the proper technique to unlock their full potential. This comprehensive guide is designed to demystify the process. We will explore everything from the fundamentals of wax melts to advanced tips and common pitfalls, ensuring you can create a perfectly scented ambiance with confidence and ease.
Understanding Wax Melts
Before diving into the methodology, it’s crucial to understand what wax melts are and how they differ from their fragrant counterparts. Often called tart melts or wax tarts, they are small, solid pieces of scented wax designed to be melted in a specialized warmer. Unlike traditional candles, they contain no wick and rely on an external heat source to release their fragrance oils into the air through the process of diffusion.
The primary comparison is, of course, to the classic jar candle. While both serve the same ultimate purpose, wax melts offer several distinct benefits. First and foremost is safety; by eliminating an open flame, melts significantly reduce the risk of fire hazards, making them an excellent choice for households with children, pets, or curious roommates. Secondly, they offer superior scent throw. Because the wax pool isn’t also fueling a flame, more energy is dedicated to vaporizing the fragrance oils, often resulting in a stronger and more consistent aroma that can fill a room more effectively. Finally, wax melts provide unparalleled versatility. You can easily switch scents without committing to a single large candle, and many enthusiasts enjoy creating custom scent combinations by melting different cubes together.
How to Use Wax Melts
Mastering the art of fragrance diffusion with melts is a simple process. Following these step-by-step instructions will ensure you get the most potent and long-lasting scent from every cube.
1. Preparing the Wax Warmer: Begin by selecting an appropriate location for your warmer. It should be placed on a stable, level, heat-resistant surface, away from edges, flammable materials like curtains or paper, and out of direct sunlight or drafts, which can affect the melting process. Ensure the warmer is unplugged before you begin.
2. Choosing the Right Wax Melt: Select a wax melt cube or shape that appeals to you. Most are breakable, so you can start with a half or even a quarter of a cube for a smaller room and add more if needed. For your first time, it’s best to use a single scent to understand its true profile and strength.
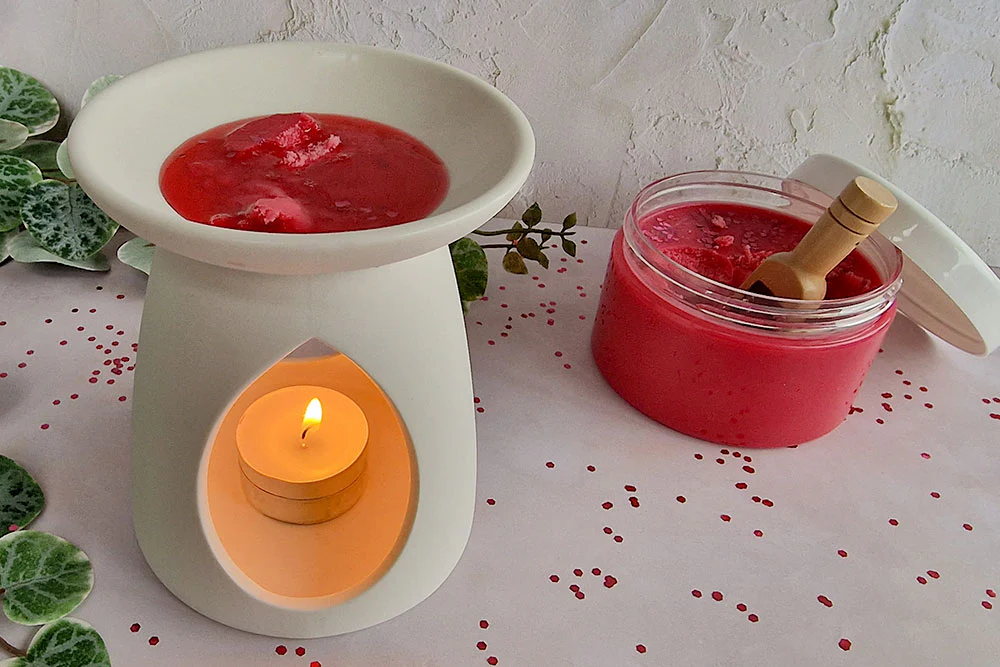
3. The Melting Process: Place your chosen wax melt piece into the top dish of the warmer. If you are using an electric warmer with a removable dish, you can place the melt directly into the clean dish. For a tea light warmer, ensure the dish is securely in place above the candle holder. Plug in your electric warmer or place a unscented tea light in the base and light it. The heat will gently warm the dish, melting the wax and releasing the encapsulated fragrance.
4. Safety Tips: Never leave a melting wax warmer unattended for extended periods. Always keep it out of reach of children and pets, as the dish and melted wax become very hot. Never add water to the warmer dish, and never move the warmer while it is in operation or the wax is liquid. For electric warmers, always check the cord for damage before use.
Understanding how to use wax melts correctly is the foundation of a safe and aromatic experience. The entire process, from selection to melting, is designed for simplicity and powerful results.
Tips for Getting the Most Out of Your Wax Melts
To elevate your wax melt experience from good to exceptional, consider these expert tips for maximizing fragrance and value.
- Master Scent Combinations: Once you’re comfortable with single scents, experiment with blending. Start with complementary notes—for example, a vanilla melt paired with a coffee scent creates a cozy café atmosphere, while bergamot and lavender can foster a serene, spa-like environment. The key is to start with small pieces of each to test the combined aroma before committing to a larger blend.
- Store Them Properly: Wax melts are potent because their fragrance oils are sealed in wax. To preserve their strength, store them in a cool, dark, and dry place. Keep them in their original packaging or in an airtight container to prevent the scents from mingling prematurely and to protect them from dust and debris.
- Know When to Change Them: A common question is how long a wax melt lasts. You can typically get 8-12 hours of fragrance from a high-quality melt, though this can be spread over multiple sessions. You’ll know it’s time to change the wax when the color has turned opaque and the scent throw has noticeably diminished. To change it, ensure the warmer is off and completely cool. The solidified wax should pop out easily. If it’s stuck, placing the dish in the freezer for a few minutes will contract the wax, allowing it to release cleanly.
Common Mistakes to Avoid When Using Wax Melts
Even with a simple process, a few missteps can hinder your experience. Avoid these common errors to ensure optimal performance and safety.
- Overloading the Warmer: It can be tempting to add multiple cubes at once for a stronger scent. However, overfilling the dish can lead to the wax overflowing once liquefied, creating a mess and a potential burn hazard. The melted wax pool should never exceed the rim of the dish. Start with one cube and add more only if necessary.
- Ignoring Safety Precautions: Complacency is the biggest safety risk. Never leave a tea light warmer burning overnight or when you leave the house. For electric warmers, while generally safer, it’s still best practice to turn them off when unattended for long periods. Always place your warmer on a trivet or coaster to protect furniture from residual heat.
- Using Poor Quality Wax Melts: Not all wax melts are created equal. Low-quality melts often use less fragrance oil and subpar wax, resulting in a weak scent throw and a shorter lifespan. Investing in high-quality, soy- or coconut-blend wax melts from reputable makers will provide a cleaner, stronger, and longer-lasting fragrance, making the entire process of learning how to use wax melts far more rewarding. The difference in performance is immediately noticeable.
Conclusion
Wax melts present a safe, versatile, and highly effective method for curating the perfect atmosphere in your home. From understanding their fundamental benefits to mastering the step-by-step melting process, you now possess the knowledge to use them like a pro. By heeding the tips for maximizing scent and avoiding common pitfalls, you can ensure every melting session is both successful and satisfying.
We encourage you to embrace the creative possibilities they offer. Experiment with seasonal scents, create custom blends for mood enhancement, and enjoy the flameless peace of mind they provide. Ultimately, mastering how to use wax melts is a simple yet impactful way to enhance your daily routine, transforming any living space into a beautifully fragrant sanctuary that reflects your unique style and comfort.